Gear guides
Beginner Canning Equipment Checklist (and What to Skip)
Everything you need for safe water-bath and pressure canning, what each tool is for, what USDA/NCHFP guidance says about jars, lids and canners, and what not to buy.
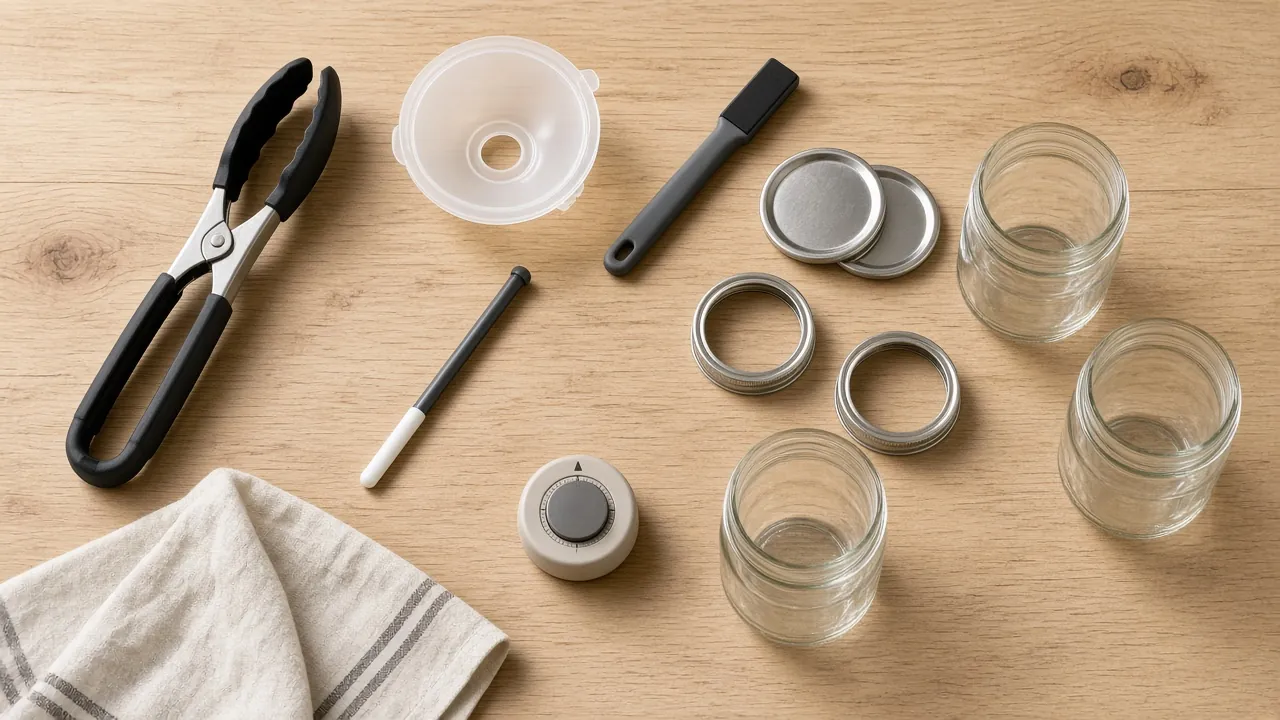
Walk down the canning aisle and you'll find dozens of gadgets. You need far fewer than that. This checklist covers the gear that actually affects safety and success, explains why each item matters, and flags the things to skip. Where it touches food safety, it follows the USDA Complete Guide to Home Canning as published by the National Center for Home Food Preservation (NCHFP).
The short list
| Item | Water-bath canning | Pressure canning | Why it matters |
|---|---|---|---|
| Canner with rack | Required: deep pot + rack | Required: a true pressure canner | The tested process depends on it |
| Mason-type canning jars | Required | Required | Made to handle canning heat and take two-piece lids |
| New flat lids + screw bands | Required | Required | New lids each time; bands can be reused |
| Jar lifter | Required | Required | Lifts hot jars upright and securely |
| Canning funnel | Strongly recommended | Strongly recommended | Keeps the sealing rim clean |
| Bubble remover / headspace tool | Strongly recommended | Strongly recommended | Releases air and measures headspace |
| Timer, clean towels, damp paper towels | Required | Required | Accurate timing, wiping rims, cooling jars |
| Tested recipe source | Required | Required | Times and headspace are recipe-specific |
| Dial-gauge testing | n/a | Yearly, if dial gauge | An inaccurate gauge can under-process food |
1. A canner that fits the method
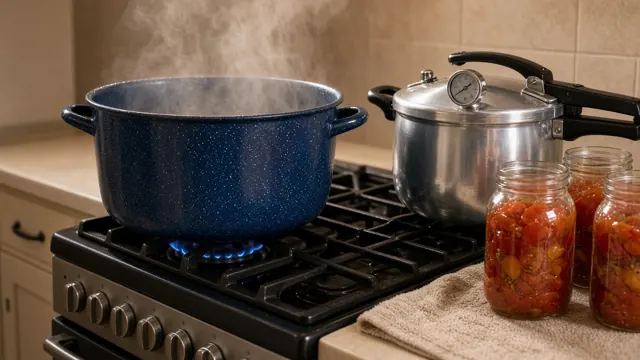
Which canner you need depends on what you're canning. Acid foods (fruit, jam, tested pickles) go in a boiling-water canner; low-acid foods (vegetables, meat, stock) need a pressure canner. Our water-bath vs. pressure canning guide explains the rule in detail.
For water-bath canning
You don't need a pot labeled "canner." NCHFP's canner guidance asks for three things:
- It's deep enough for at least 1 inch of briskly boiling water over the jar tops, or 2 inches for processes over 30 minutes. Quart jars need a tall pot.
- It has a rack to keep jars off the bottom, and a fitted lid.
- On an electric range, it has a flat bottom and is no more than 4 inches wider than the element.
For pressure canning
You need a real pressure canner with a gauge, vent port and safety device, not a pressure saucepan. NCHFP says smaller-capacity pressure saucepans aren't recommended for canning, and its low-acid processes were developed for canners that hold four or more quart jars standing upright (NCHFP on multi-cookers). NCHFP also advises using only canners with UL approval.
Electric multi-cookers aren't cannersNCHFP does not recommend using its canning processes in electric multi-cookers, even ones with a "canning" button. No USDA thermal-process work has been done with jars inside them.
2. Jars made for home canning
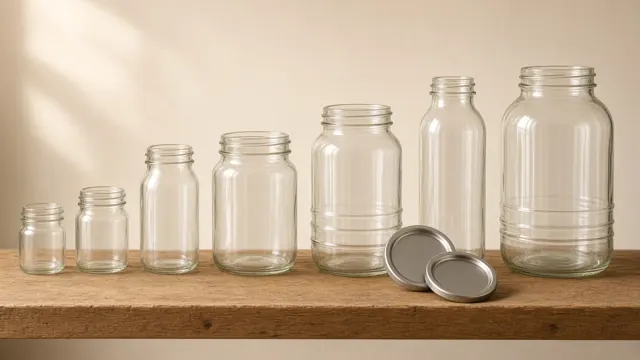
NCHFP calls regular- and wide-mouth Mason-type, threaded home-canning jars with self-sealing lids "the best choice." It lists them in ½-pint, pint, 1½-pint, quart and ½-gallon sizes, and says that with careful use they "may be reused many times, requiring only new lids each time" (NCHFP: Recommended Jars and Lids).
Can you reuse a commercial mayonnaise jar? NCHFP says most pint- and quart-size mayonnaise or salad-dressing jars can be used with new two-piece lids for acid foods, but you should expect more seal failures and breakage. They're not recommended for pressure canning because of excessive breakage. Commercial jars that can't take a two-piece canning lid aren't recommended for any home canning.
Before each use, check every rim for nicks and every jar for cracks. Our jar size guide covers sizes, mouth widths and when jars need sterilizing.
3. Lids and bands
The standard two-piece closure is a flat metal lid with a sealing compound, held on by a screw band during processing. NCHFP's key points:
- Use a new flat lid every time. Jars and bands are reusable; flat lids are not.
- Buy only a year's worth. NCHFP says gaskets in unused lids work well for at least 5 years from manufacture, but older lids may fail.
- Follow the lid maker's directions for preparing lids and tightening bands. Bands that are too loose can let liquid escape; too tight can stop air venting, buckle lids or break jars.
- Don't retighten bands after processing.
- Remove bands for storage once jars have cooled. Bands left on can rust and make it harder to spot a failed seal. Washed and dried, bands can be reused many times.
Discard old, dented or deformed lids, or lids with gaps in the sealing compound.
4. The small tools that prevent big problems
Jar lifter
Hot, wet jars are slippery. A jar lifter grips the jar below the neck (NCHFP says below the screw band) so you can lower and lift it upright. Tilting a jar can slop food into the sealing area.
Canning funnel
A wide funnel that sits in the jar mouth keeps food off the rim. Food left on the sealing surface is a common cause of seal failure, and NCHFP has you wipe rims with a dampened paper towel before lidding.
Bubble remover and headspace tool
Trapped air bubbles can change headspace and liquid coverage. NCHFP's method is to run a flat plastic (not metal) spatula between the food and the jar, turning the jar slowly. It isn't needed for jams, jellies or all-liquid foods like juice. Many bubble removers also have stepped notches to measure the headspace your recipe names.
Lid wand, labels, marker
These are nice to have. A magnetic wand lifts lids out of hot water, and labels with the product and date help with rotation: NCHFP's storage guidance says for best quality, can no more than you'll use within a year.
5. Kitchen basics you probably own
- A large pot for hot-packing, plus a ladle
- Clean towels to set hot jars on, with at least 1 inch between jars as they cool for 12 to 24 hours
- A reliable timer
- A kitchen scale and measuring cups. Tested recipes specify amounts, and acid amounts in particular must be exact
- Bottled lemon juice or citric acid if you're canning tomatoes. The USDA guide says tomatoes must be acidified to be canned as acid foods
6. A tested recipe source
This is the most important "tool" on the list, and it can be free. The full USDA Complete Guide to Home Canning is available free through NCHFP, and NCHFP's site has hundreds of tested recipes. Current canning books from jar makers and university Extension publications are also good sources. Avoid recipes that don't list jar size, headspace, processing time and altitude adjustments. Those details are the safety process.
7. Extra gear for pressure canning
- The manual. Read it before the first batch; venting, weights and cool-down details are model-specific.
- Gauge testing (dial gauges). NCHFP says to check dial gauges for accuracy before use each year and replace any reading more than 2 lbs off. Many county Extension offices do this; in Tennessee, start with UT Extension.
- A spare gasket and overpressure plug, if your model uses them. NCHFP notes nicked or dried gaskets let steam leak.
What not to buy (or do)
| Skip this | Why |
|---|---|
| Electric multi-cooker as a canner | NCHFP doesn't recommend its processes in multi-cookers |
| Small pressure saucepan for canning | Not recommended by NCHFP; low-acid processes assume a canner holding 4+ quarts |
| "Canning powders" | NCHFP: useless as preservatives; don't replace heat processing |
| Oven, microwave or dishwasher "canning" | Not recommended; doesn't prevent spoilage risks |
| Open-kettle method (no processing) | Not recommended |
| Wire-bail jars with glass lids, zinc caps | Fine for dry storage, not for canning |
| Reused flat lids | Use new flat lids each time |
| Metal utensils to de-bubble | NCHFP specifies a plastic spatula |
Our picks
Affiliate disclosure: As an Amazon Associate I earn from qualifying purchases. Buttons marked "Check it on Amazon" are affiliate links, so The Canning Shelf may earn a commission at no extra cost to you. Maker links are plain links. Picks are based on published specs, not payment. See our disclosure.
These picks are based on the maker's published details, checked October 31, 2026, not on our own long-term testing. Ball's pages point to retailers through a "Where to buy" link rather than selling directly.
Ball Canning Utensil Set, 3-Piece (Model 1440010809)
This covers the jar lifter, funnel and bubble remover/headspace tool, which are the three small tools from section 4, at once.
- Jar lifter, bubble remover/headspace tool and jar funnel (Ball product page)
- Ball says the funnel fits both regular- and wide-mouth jars
- Listed as heat-resistant and BPA-free
Ball Wide Mouth Pint Jars with Lids and Bands, 12-Pack (Model 66000ZFP)
The pint is the size you'll see most often in tested recipes, and the wide mouth makes packing and cleaning easier.
- 12 × 16 oz wide-mouth glass jars with lids and bands (Ball product page)
- Listed as made in the USA, BPA-free, freezer safe
Presto 23-Quart Pressure Canner and Cooker (No. 01781)
If you'll eventually can low-acid foods, Presto says this model doubles as a boiling-water canner, holds 7 quart jars and works on regular and smooth-top ranges. Full reasoning is in our canning methods guide.
Check it on Amazon Maker's page (gopresto.com) Amazon link is an affiliate link · maker link is notYour first canning day, step by step
- Choose a tested recipe and read it twice. Note the method, jar size, headspace, time and your altitude adjustment.
- Check jars for nicks and cracks, wash them in hot soapy water, and keep them warm. Sterilize them only if the recipe calls for it (processes under 10 minutes; see our jar guide).
- Prepare lids according to the manufacturer's directions.
- Start heating the canner water (140°F for raw pack, 180°F for hot pack, per NCHFP).
- Prepare the food, fill jars using the funnel, remove bubbles, and measure headspace.
- Wipe the rims, apply lids and bands as directed, and load jars upright with the jar lifter.
- Process exactly as the recipe and NCHFP canner steps direct. Restart the timer if the boil or the pressure drops.
- Cool jars on a towel for 12 to 24 hours, test seals, remove bands, label, and store between 50°F and 70°F for best quality.
Start smallA first batch of a simple tested jam or pickle in half-pints lets you learn the rhythm (fill, wipe, lid, process, cool) before a long pressure-canning day.
Sources
- NCHFP / USDA, Recommended Jars and Lids
- NCHFP / USDA, How to Use Boiling Water and Pressure Canners
- NCHFP / USDA, Equipment and Methods Not Recommended
- NCHFP / USDA, Storing Home Canned Foods
- NCHFP / USDA, Ensuring Safe Canned Foods
- NCHFP, Can I Can in a Multi-Cooker?